

How to Apply Castor Oil for Stretch Marks: Step by Step
Table of Contents
- What Castor Oil Can and Cannot Do for Stretch Marks
- What You'll Need Before You Start
- Step 1: Do a Castor Oil Patch Test
- Step 2: How to Use Castor Oil on Skin, From Clean Skin to Warm Oil
- Step 3: How Long to Leave Castor Oil on Skin
- Step 4: Build a Routine for Castor Oil for Belly Skin
- Safety, Dilution, and When to See a Professional
- Conclusion
- Frequently Asked Questions
Last Updated: October 18, 2026
What Castor Oil Can and Cannot Do for Stretch Marks
Castor oil for stretch marks is a popular home routine, but it helps with moisture and massage, not with erasing marks. At Doyley's Beauty Care, we tell customers the same thing: castor oil is a rich, thick oil that softens skin and supports hydration, and that is where its real value sits.

Stretch marks form when skin stretches faster than it can adapt, and the marks sit deeper than the surface layer. No oil reaches that depth.
Red Marks, White Marks, and Why Timing Matters
New stretch marks often look red, pink, or purple. Older ones fade to white or silver and feel slightly indented. Red marks respond better to any topical routine because the skin is still active there. White marks are largely settled. Oiling a white mark will make the area feel softer and look less dry, but it will not restore the original texture.
That is the honest starting point. Here is what you can expect from a consistent routine:
- Softer, more supple skin around the marks
- Less dryness and flaking, which can make marks look less obvious
- A few minutes of gentle massage, which many people find soothing
- No guaranteed fading, and no change to deep white marks
What You'll Need Before You Start
Gather everything first so the routine takes minutes, not a scavenger hunt. You need four things:
- A pure castor oil. We recommend Doyley's Haitian Black Castor Oil, a thick, rich oil that hydrates skin and leaves it soft and supple.
- A carrier oil if your skin is sensitive. Sweet almond oil or jojoba oil both work well for dilution.
- A clean towel and mild cleanser. Oil goes on clean skin, not over lotion or sweat.
- A patch test plan. More on this in the next step.
Skip anything with added fragrance if your skin reacts easily. Simple is safer.

Step 1: Do a Castor Oil Patch Test
A castor oil patch test is a small application of diluted oil on a discreet patch of skin, left for 24 hours to check for irritation before you use it on a larger area. Do this every time you open a new bottle, even if you have used castor oil before.
Where to Test and What to Watch For
The inner wrist or the inside of the elbow are the standard spots. Both are thin-skinned and easy to check.
Here is the process:
- Wash and dry the test area.
- Apply a small amount of diluted castor oil.
- Leave it uncovered for 24 hours.
- Check for redness, itching, burning, or swelling.
A mild tingle that fades is usually fine. Any lasting redness or raised skin means stop and try a different oil. If you have a known skin condition or you are pregnant, ask your doctor before starting any new topical routine.
Step 2: How to Use Castor Oil on Skin, From Clean Skin to Warm Oil
To use castor oil on skin, start with clean, slightly damp skin, warm a small amount between your palms, and massage it in with light circular motions for two to three minutes. Warm oil spreads further and feels less sticky.
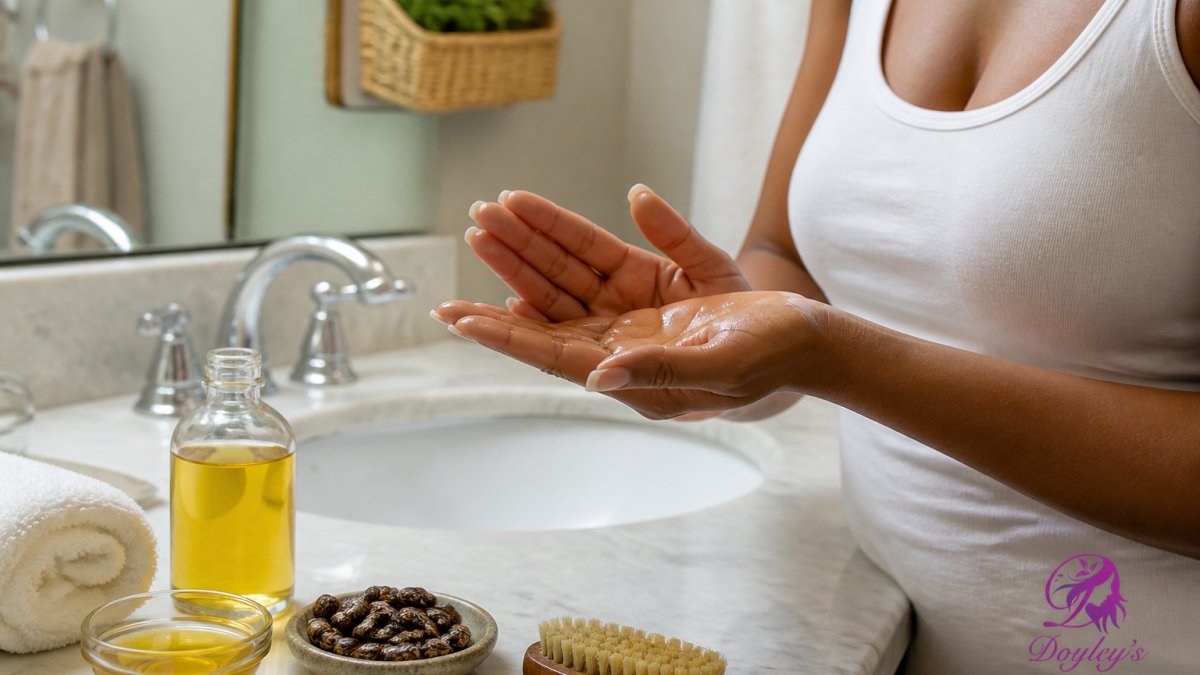
The order matters more than people think. Oil applied over lotion, sunscreen, or sweat sits on top and does not absorb well. Clean skin first, always.
A Reproducible Amount, Not a Guess
Most people use far too much castor oil, which is why it ends up on clothing and bedding. A workable starting point for a belly or thigh area is about a half-teaspoon, roughly the size of a nickel when pooled in your palm. That is enough to cover an area the size of your hand with a thin, even film.
If your skin is on the sensitive side, blend the castor oil with a lighter carrier oil. Patch test the blend too.
Massage Technique: Small Amounts, Circular Motions, 2 to 3 Minutes
A small amount goes a long way. Start with the measured amount above and add more only if you need it.
- Use flat fingers, not fingertips
- Work in gentle circles over and around the marks
- Keep pressure light, especially on the belly
- Spend two to three minutes per area
- Stop if anything feels sore or irritated
Massage is the part people skip, and it is the part that makes the routine feel worthwhile. Slow, steady circles are enough.
Cleanup, Staining, and Storage
Castor oil is thick and yellow-brown, and it will leave a mark on fabric if you are careless. A few practical habits keep the routine manageable:
- Protect fabric first. Keep a dedicated dark towel for application and for sitting or lying on while the oil absorbs. Light-colored sheets and pajamas show oil stains quickly.
- Wipe before you dress. Blot any excess with a clean towel before putting on clothing, especially if you are applying in the morning.
- Wash hands with a grease-cutting step. Warm water and a small amount of dish soap remove the film better than hand soap alone. A soft nail brush helps around the cuticles.
- Store the bottle tightly closed in a cool, dark spot away from direct sunlight. Castor oil is thick and slow to turn, but heat and light degrade any oil over time.
- Wipe the bottle neck after each use so oil does not run down the side and make the bottle slippery.
If oil does get on fabric, treat it before washing. Blot the excess, work a small amount of liquid dish soap into the stain, let it sit for a few minutes, then wash in the warmest water the fabric allows. Hot water alone can set an oil stain, so pre-treat first.
Step 3: How Long to Leave Castor Oil on Skin
How long to leave castor oil on skin depends on your schedule and your skin.
Both work. The overnight option gives the oil more contact time, but it can stain sheets and pajamas. A dedicated old towel solves that.
If you leave it on overnight, use a thinner layer than you think you need. A heavy coat transfers to everything you touch.
Step 4: Build a Routine for Castor Oil for Belly Skin
Castor oil for belly skin works best as a short, repeatable habit rather than an occasional treatment. Once or twice daily is the usual rhythm, and consistency matters more than quantity.
Here is a routine that fits into a normal day:
| Step | Timing | What to Do |
|---|---|---|
| Cleanse | Morning or night | Wash the area with a mild cleanser, pat dry |
| Warm | Immediately after | Rub a small amount between palms |
| Massage | 2 to 3 minutes | Gentle circles over and around marks |
| Wait | 20 to 30 minutes | Let it absorb, or leave overnight |
| Rinse | Optional | Warm water if residue bothers you |
During pregnancy, many people prefer a lighter layer and a shorter contact time. Stop if you notice irritation.
Our Haitian and Jamaican Black Castor Oil 1:1 blend is a good middle ground if you want a slightly lighter texture than pure castor oil. It is hexane-free and blends well with carrier oils.
What the Research Does and Does Not Show
It helps to separate what castor oil can do from what people hope it will do. There is no strong body of clinical evidence showing that castor oil fades or removes stretch marks.
In other words, castor oil is a moisturizer and a massage medium, not a mark remover. Treating it as the former sets realistic expectations; treating it as the latter leads to disappointment. If your goal is softer, better-hydrated skin around the marks, a consistent routine can deliver that.
A Realistic Timeline
Skin hydration changes show up quickly, often within the first week or two of regular use. The area feels less tight and looks less dry. Beyond that, be cautious about promises.
A reasonable way to judge the routine is to give it four to six weeks of consistent use and watch for comfort and hydration rather than dramatic fading. If you see no change in how the skin feels by then, the oil is not the limiting factor.
Red Marks Versus White Marks: Set Expectations by Type
New stretch marks that look red, pink, or purple are still active, and the skin there tends to respond better to any topical routine, including moisturizing and massage. Older marks that have faded to white or silver are largely settled. Oiling a white mark will make the area feel softer and look less dry, but it will not restore the original texture. Knowing which type you are working with keeps the routine honest.
Safety, Dilution, and When to See a Professional
Castor oil is generally well tolerated, but thick oils can clog pores and trap heat. Dilution helps, and so does keeping layers thin.
A few safety points worth knowing:
- Dilute with a carrier oil if you have sensitive skin
- Patch test every new bottle or blend
- Avoid broken, cracked, or sunburned skin
- Do not apply to the face unless the product is intended for it
- Stop at the first sign of irritation
See a dermatologist if marks are spreading quickly, if the skin is painful or itchy, or if you want to explore options beyond home care.
Conclusion
Building a stretch mark routine takes patience, and the results are rarely dramatic. What you can control is moisture, gentle massage, and consistency, and those are worth having on their own.
At Doyley's Beauty Care, our Haitian Black Castor Oil is thick, rich, and made for exactly this kind of daily skin and hair care.
Start with a patch test, keep your layers thin, and give it a few weeks. Browse our full castor oil range and add a bottle to your routine today.
Frequently Asked Questions
How do you apply castor oil to stretch marks?
Start with a patch test on your inner wrist or elbow and wait 24 hours. Wash and dry the area, warm a small amount of castor oil between your palms, and massage it into the stretch marks in gentle circular motions for 2 to 3 minutes. Leave it on, then repeat once or twice daily. Consistency matters more than the amount you use, and a carrier oil or dilution can help if your skin is sensitive.
How long should you leave castor oil on stretch marks?
Most people leave castor oil on for at least 24 hours or until the next wash, applying it before bed as part of a daily routine. Because it is thick, a small amount goes a long way. If you prefer not to sleep in it, apply it after a shower and leave it on for a few hours. Patch test first, and stop if you notice irritation or an allergic reaction.
Can castor oil help improve the appearance of stretch marks?
Castor oil is a rich moisturizer that supports hydration and skin elasticity, which can help stretch marks look softer and less noticeable over time. It will not erase older white marks or replace evidence-based treatment. Results depend on mark type, skin texture, and regular use. Our Haitian Black Castor Oil is a moisturizing option for daily massage, but no oil can guarantee fading.
Should you dilute castor oil before applying it to skin?
Diluting castor oil is a good idea if your skin is sensitive. Mix it with a carrier oil, or blend it into a moisturizer or serum. A patch test on your inner wrist or elbow helps you check for sensitivity before using it on stretch marks. If you have irritation, an allergic reaction, or a skin condition, ask a healthcare professional before regular use.